Although this tutorial is long, the project itself is easy enough for someone new to crafting. Click on images to enlarge.
- Wood or wood scraps. You will see the dimensions needed in the directions. Feel free to improvise on size.
- Safety goggles and a mask to use when cutting and sanding wood.
- A saw, manual or power. If you don't have one, borrow the neighbor's :)
- Sandpaper, both medium grit (80 grit) and fine grit (120 grit).
- A tack cloth or a damp rag to wipe off the dust after sanding.
- Brad nails that are 1" or 2.54 cm. You will need approximately 13. Use more or less at your discretion.
- A hammer or a nail gun. I like power tools for their fast results :)
- Wood Glue
- Felt or fun foam to attach to the bottom of the calendar
- Glue of choice or Velcro strips, squares, or circles to adhere the felt to project. You may also use glue to adhere the felt to the bottom of the project.
- Paint brush. I used a 3/4" flat brush.
- A glass, cup, or can of water to clean paint brush.
- DecoArt Americana Premium Multi-Surface Satin Acrylic paint in the color or colors of your choosing. I used Black Tie DA539-30. There are 40 colors to choose from and the benefit of this paint is that you do not need to prime nor seal your project.
- DecoArt Americana Decou-Page Glue in Matte DS106-64 or you can use Gloss (DS101-64) if you prefer. I love DecoArt Decou-Page because it is not sticky or tacky when dry unlike some of the popular brands out in craft land.
- Decorative papers. I used 7 Gypsies Avignon 6" x 6" pad of papers.
- A paper trimmer or a ruler and a razor cutter.
- Any embellishments of your choosing. I used a swirled coil glued to the back of my calendar to hold pictures. Mini clothes pins would work for this as well.
- Hot glue gun and glue sticks, E-6000, silicone household glue, or any other strong glue of your choosing.
- Wood thickness of 1/2" (1.27 cm) is recommended. I used 3/4" (1.9 cm) wood because that is what I had on hand. I suggest using pine or another soft wood as it is easier to cut and sand than hardwood and it costs less as well.
- For the back of the calendar, cut wood 4 1/8" x 3 3/8" or 10.47 cm x 8.57 cm. I made my backing bigger and cut my wood 4 1/8" x 4" or 10.47 cm x 10.16 cm.
- For the bottom of the calendar, cut wood 4 1/8" x 2 1/8" or 10.47 cm x 5.39 cm.
- For the sides of the calendar, cut two wood pieces measuring 2 3/4" x 3 3/8" or 6.98 cm x 8.57 cm.
- For the numbered day blocks, cut two wood blocks measuring 2" square or 5.08 cm square. I skipped this step as I was able to buy 2" wooden blocks at Michael's and Joann Fabrics.
- For the month blocks, cut three pieces of wood measuring 4" long x 3/4" square or 10.16 cm long x 1.9 cm square.
- Sand wood pieces with a medium grit sandpaper first (80 grit) and then a fine grit (120 grit) sand paper until smooth. Wipe dust off with a tack cloth or a damp rag.
Assembling the calendar:
 |
| Photo credit for the labeled picture above is http://www.scrapbook-crazy.com/ |
- Glue the bottom piece of wood to the back piece of wood with wood glue. Hammer in 3 brad nails that are 1" long or 2.54 cm long for extra security. Hammer the middle and the two ends. You should have an L shape now or a shape that resembles a couch or bench without the sides or legs. If any glue oozes out, wipe with a damp rag or your finger.
- Now apply the sides. Apply a thin line of glue to the outer edge of both the bottom piece of wood and the long edge of the back piece of wood. Align the side piece against the glued edges of both the bottom and back pieces of wood, press together, and hammer in brad nails for extra security. Use 3 brad nails to the area where the side connects to the bottom (middle and each end) and 2 additional brad nails to the area where the side connects with the back piece of wood (middle and top end as the bottom end already has a nail in it). If any glue oozes out, wipe with a damp rag or your finger. Allow the glue to dry and repeat this step to attach the other side piece of wood. You now have a piece of wood that resembles a bench that sits flat to the ground.

Pictured above is my version with the taller back piece of wood. If you follow the measurements in the tutorial, your top will be the same height as your sides. Below is my version assembled prior to decorating.


 |
| Pictured above is what the calendar should look like if you followed the measurements in the tutorial. |
- Sand any additional rough edges or areas with raised glue using your fine grit (120 grit) sandpaper. Wipe dust with a tack cloth or a damp rag.
- Paint, stain, decoupage, or decorate your calendar holder, day blocks, and month blocks as desired. I painted mine with DecoArt Americana Multi-Surface Satin Paint in Black Tie. This paint requires no primer or sealer. I then used DecoArt Decou-Page Glue in Matte to adhere decorative paper from 7 Gypsies, the months of the year, and the numbers to the day blocks.
 |
 | |
|
 |
| I used Distress Ink in Antique Linen on the edges of my day blocks. I also added the same ink to the month blocks. |
- Apply the names of the months on the 4 inch long by 3/4 inch squared pieces of wood. I printed my months on regular copy paper and added some Distress ink in Antique Linen. After my DecoArt Americana Multi-Surface Satin paint dried, I decoupaged the months to the blocks with DecoArt Decou-Page in Matte. The first block has January, February, March and April. The second block has May, June, July, and August. The third has September, October, November and December
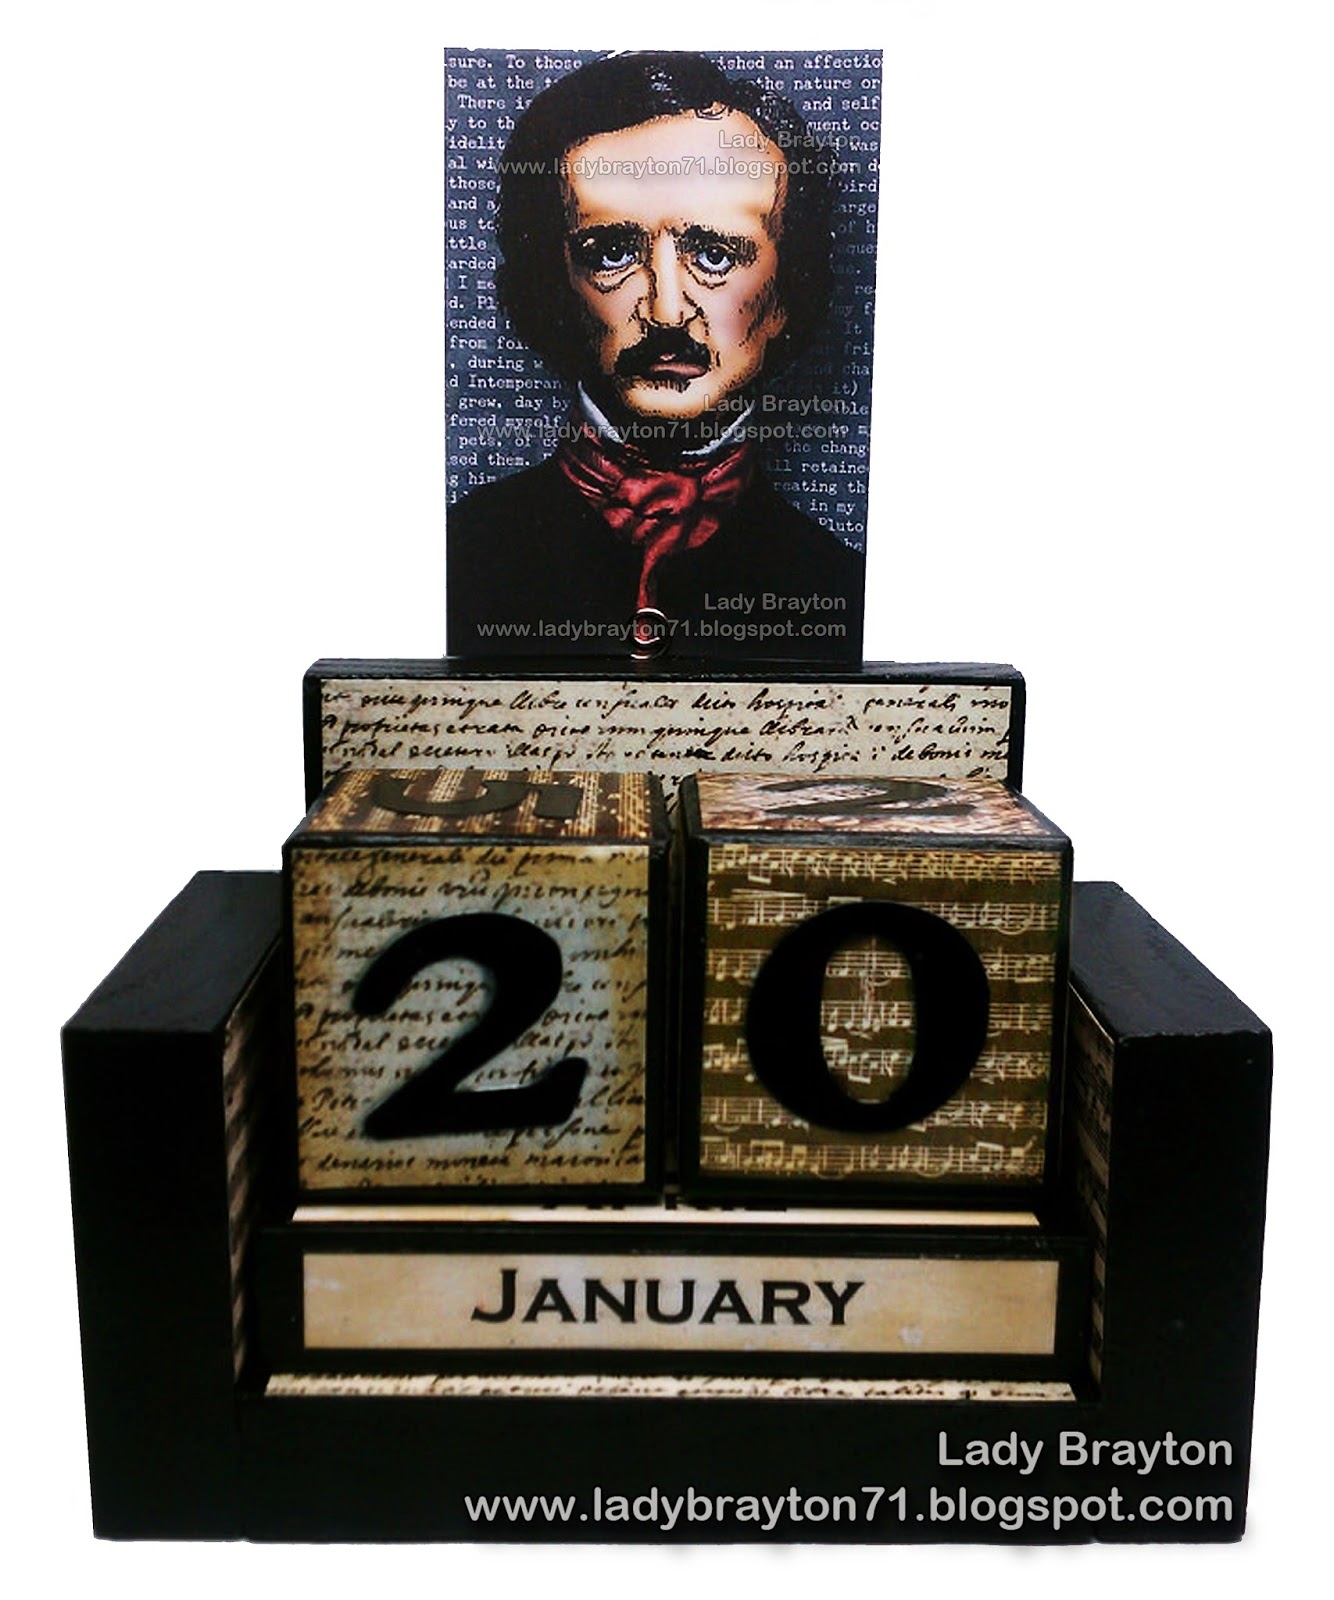
- Number your two 2" day blocks. Your first block should have the number 0 on the bottom and the number 5 on the top of the block. The sides should have the numbers 1, 2, 3, and 4. Your second block should have the number 0 on the bottom and the number 8 on top of the block. The sides should have the numbers 1,2,6,7. (If you didn't notice, there is no number 9. The number 6 flips and doubles as the number 9). I used my Cricut to cut numbers out of black thin cardstock. You can paint your numbers, use markers or even use stickers to create your numbers.
- Apply felt or fun foam to the bottom of the calendar holder so it will not scratch your desk or furniture. I attached felt by adhering Velcro strips to the bottom of my calendar.
- Now that your calendar is made and decorated and all of your blocks are numbered and have the days of the months on them, place the month blocks on the bottom of your calendar holder with the current month facing outwards.
- Set the square number blocks on top of the month blocks with the correct date facing outwards.
- Rotate the blocks as needed to change the days and months.


I used silicone household glue to attach the decorative coil the the back of the calendar. This coil is acts like a paper clip to hold and display different pictures depicting the season or month. A mini clothespin would work as well. I kept the calendar in neutral colors so it could be used all year. The Poe image in my ATC displayed below was drawn by Rick St. Dennis and can be found HERE in his Zibbet shoppe. The backing paper features a blurb from Poe's short story "The Black Cat".
 |
There are so many different kinds of Perpetual Calendars you can make. I'm sure you will see more tutorials of different calendar types in the months to come. I know I plan on making many more in many different styles. These calendars make great gifts! If you haven't seen it before, Helen did a tutorial on another version of a perpetual calendar. Click HERE to find her tutorial.
Thanks for looking at my work!
~ Lady Brayton ~
wow what a great tutorial! It turned out so cool and so great! I love your work! XXX
ReplyDeleteI truly love this calendar. You are so creative and talented! This is really just marvelous! You make me want to make one, but I suck in cutting wood the correct size. Really awesome tho! Your art is always terrific!
ReplyDeletePeace,
Kristy
This is fantastic! KristyLee, I got mine at Oriental Trading - they have a blank one where the blocks and everything comes pre-cut, so all you have to do is decorate, which is what I'm going to do now that I've found this AWESOME tutorial! I was terrified I'd mess up the number blocks, so thank you for the help on that! Can't wait to see how mine turns out - and I LOVE your Poe theme, so cute!!!!
ReplyDeleteI have just recently found the pre-cut kits at Joann Fabrics for $4.99. Well worth the money to have the pre-cut items as it saves a lot of time!
ReplyDelete